Want to make a photo animation for social media or your website?
I’ll walk you through it.
Situation: You have 3-4 images or more that you’d like to create an animated photo sequence from. You may have shot with motor drive or just shot a very quick continuous series with the same composition.
You can use Photoshop to:
- stack the layers
- align the layers
- create a frame animation
When you shoot a sequence, or series of images with the camera pointed at the same subject area, it is most convenient to use a tripod. In Photoshop the align layers function will help resolve the fact your images are not perfectly aligned.
After applying this you may see some gaps at the edges which will require patching or cropping (cropping is easier).
Note: This process is also handy for doing edits of images in Photoshop to merge the best attributes of multiple images. Align the pieces you want to keep and then delete bits that don’t work.
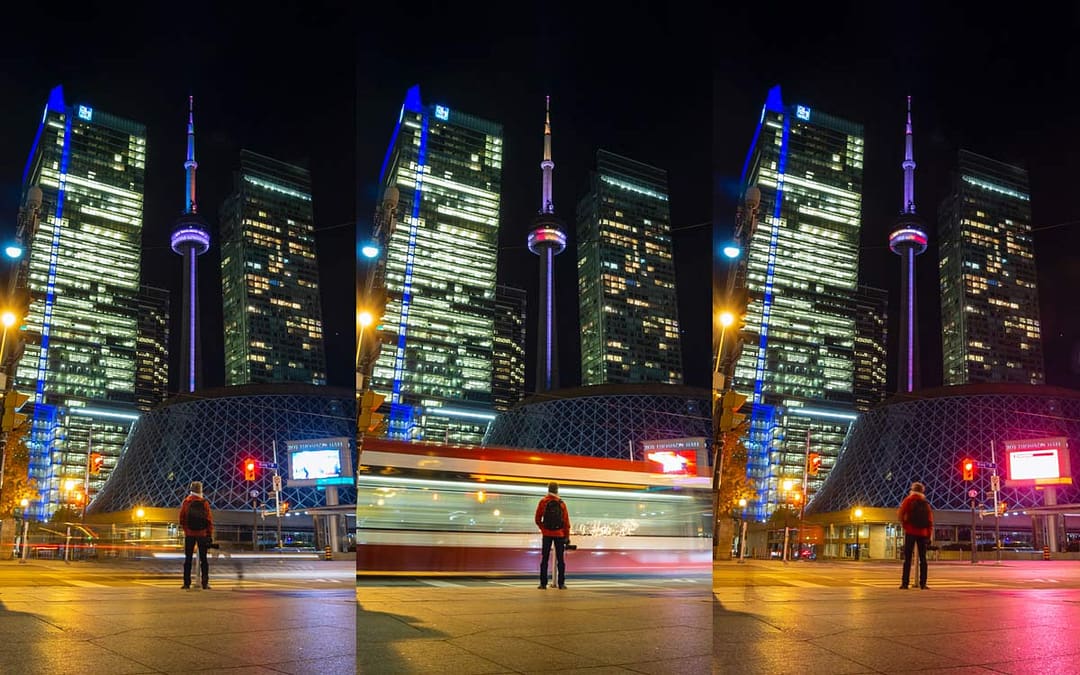
Here’s How the Image Sequence Looks as a GIF

Quick Tutorial to Export Video from Image Sequence
- Shoot a series of images (tripod is best, otherwise be steady)
- Open Photoshop and use File > Script > Load files into stack
- Apply Edit > Auto align layers to remove jiggles (select all layers first)
- Open Window / Timeline panel
- Click create frame animation
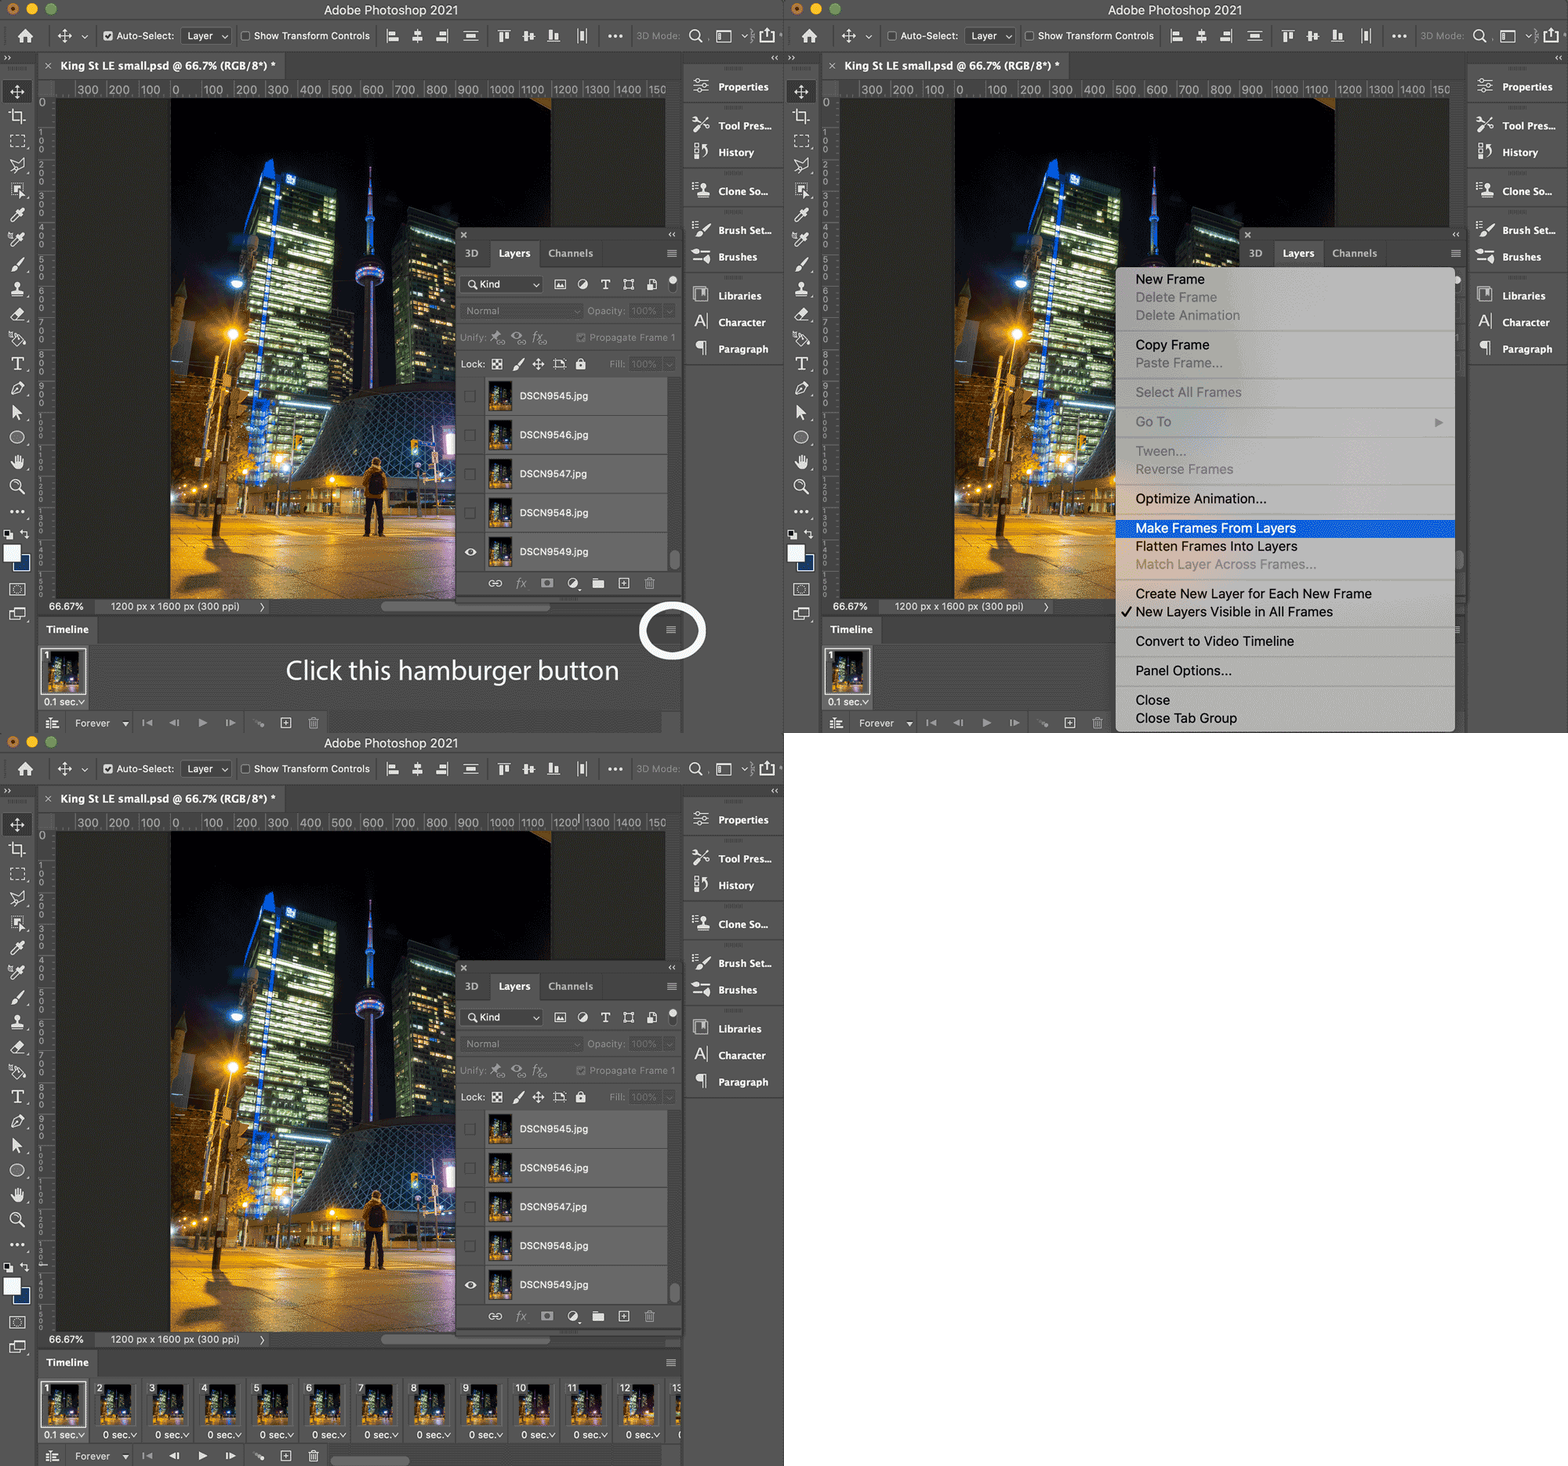
- Add more frames to the single frame by clicking on the small icon on the right of the timeline window and selecting “Make frames from layers”
- In timeline panel change timing to 0.1 second or faster (I use 0.2-0.5 seconds for most sequences)
- Export the file to video by using File > Export > Render video
- Apply colour correction or other tweaks inside your favourite software
King St long exposure by @mikesimpson.ms
Animated GIF Export
To embed on your website export a GIF in Photoshop. Either start with the PSD file or import a video and then choose File > Export > Save for web (legacy) and then choose GIF as your format, and Animation > looping options > forever.
Be warned you may need to make adjustments to the quality as the size can be surprisingly large. Sometimes I use the lower quality settings to get size down. Try reducing colours and dither.
It’s amazing how that this streetcar animated GIF is 6 MB! It’s obviously not a good idea to load your website with many of these!
However unlike many quick GIFs people insert on the net, this one is based on a complex series of images with a lot of information (Detail).
My original images were 3000×4000 pixels but to create this at a reasonable size I ended up at 600×800 pixels. There are 51 frames which is rather a lot.
Screenshots from Photoshop
This tutorial is about a beginner/ intermediate level. To assist, here are some screenshots. Be sure to select the hamburger icon in the timeline panel that will open the dialogue with option to “Make frames from layers.”
Don’t miss the hamburger style button (horizontal lines) in the lower right of the software , or top right of the timeline panel to see the the “Make frames from layers” option.

Wrapping Up
That’s it. It is a really cool effect that I’ve seen very few people use and adding video to your portfolio is a great idea to freshen things up. Remember to use animated GIF for web, because unlike Instagram for example, which oops video playback, web browsers don’t loop video.
You can do similar photo and image animations in After Effects, Premiere and other software by taking advantage of “image sequence” editing or just loading your pictures into the software and start playing around on the timeline.
Lastly in Photoshop you can also try frame blending inside your photo animation for a unique look. I tried it with my recent flag photo animation and it has potential (maybe more frames?).
After you try this be sure to let me know how it turned out. Be creative and have fun!
Follow Mike on Instagram: @tdot_mike
Adobe help page: https://helpx.adobe.com/photoshop/using/creating-frame-animations.html

