Article and photos by Eric de van der Schueren
Introduction to the Basics of Star Trail Photography and Milky Way Photography. It Is Possible With Almost Any Camera!
Are you new to photography and want to try to capture the stars on your DSLR? You don’t need an expensive camera, lenses, or telescope to get decent results.
This short tutorial will introduce you to the basic principles of astrophotography. I’ll break down the basics for you so you can knock your shots out of the park…or galaxy.
Astro photography is an image of the night sky. The milky way, star trails, moon, or deep space.
What You Need:
- DSLR Camera (kit lenses will work just fine for a start)
- Tripod (the sturdier the better)
- Shutter Trigger (completely optional, I still don’t use one)
- Patience (not every plan works out, not every night is clear)
- Headlamp or flashlight
The Plan
Plan to shoot in the darkness. I like to shoot when there is no moon as even that affects the brightness of stars. Bring a flashlight or headlamp. Especially if you have never been to the area and are showing up after dark.
The Shot
This is the easy part. Dial in your camera settings and get your composition. Sit back and relax under the stars. Below are ideal camera settings.
Lens
Wide angle lense is preferred for the vast landscape astro shot, but you can use anything
Aperture
As small as possible. Many kit lenses like the ever popular 18-55 will go down as low as 3.5. I use my 11-16mm lens at f2.8
ISO
Shoot abnormally high (compared to daytime photography). I would suggest somewhere around the 2000 range as a start, some people will go as high as 6400 or more.
White Balance
I use daytime as a base setting. Shooting in RAW you will be able to change your white balance in post production
Shutter
Around 15 second depending on your lens. Look up the 500 rule for general guidelines on how to get your star pinpoint sharp
Quantity
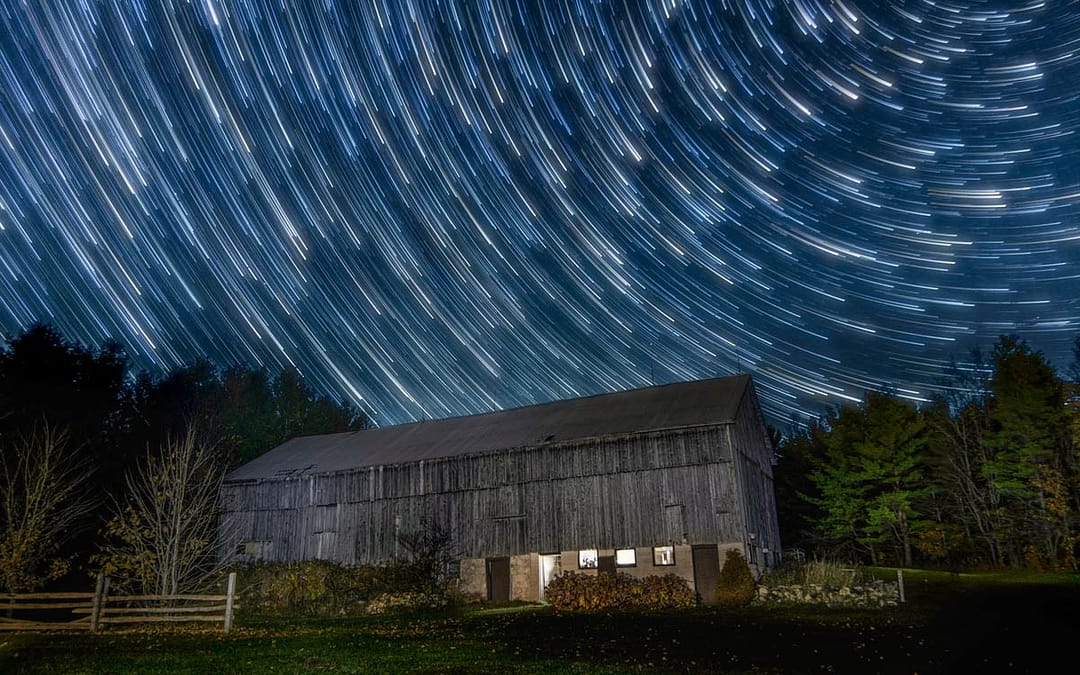
To create star trails you will want to set your camera to repeatedly take pictures over a certain period of time. I like to stack a minimum of 50 shots and can go as high as 1000 or more. Start with a smaller number to get used to shooting like that and ease the post processing and stacking of the images
Post Processing to Produce Star Trails
To stack the photos either use photoshop or a free program called Starstax. There are others out there, but I find these two simple and effective.
Photoshop
- Load photos into layers from lightroom or directly in photoshop.
- Select all layers in the layers tab
- Change blend mode to lighten
Starstax – The Easy Way (Use this method if you lack processing power, photoshop or patience)
- Load images in to Starstax
- Click the stack button
In a matter of seconds you will have turned your dozens of photos into one beautiful star trail
Practice comet mode: Comet mode fades the star trails to look like comets burning through the sky. It can be a very dreamy, artistic and stylish effect
Voila! It’s that simple. This basic guide will get you on your way to shooting amazing star trails and other astrophotography. The camera settings can be used for all sorts of night time photos, like light trails, light painting, milky way shots, and even the moon.
To sum it up:
- Find somewhere with as little light pollution as possible
- Dial in your camera settings
- Around 15s depending on your focal length (use the 500 rule)
- ISO 2000 +
- WB Daylight
- Adjust settings from there
- Keep it simple to start
- Stack in StarStax if trying to produce star trails
About the Author
My name is Eric and I started shooting a couple of years ago. I started out shooting with my drone while I lived in Australia. I have an interest in most types of photography but my true passion lies in night time and astrophotography. If you have any questions or comments feel free to visit my Instagram page.
IG: @ericdvds
Here are some of Eric’s shots from Instagram:

