By Sayantan Basu
“Covid 19” or Corona virus has people indoors a lot. As a photographer being quarantined is really challenging but I think we should accept this and strategize our next step accordingly to “make the most of the quarantine”.
The thing I am doing these days is editing, which involves revisiting my old memory cards, figuring out some untouched photographs and processing them in my own way to give it a unique style.
You can see below the raw version of Elgin & Winter Garden Theater that I captured a few weeks back. I am going to share the basic post processing technique that I followed to process this photograph using Adobe Lightroom.
Special Tip: streets are always dramatic and unpredictable, so getting the perfect composition is really tough. That’s why I always prefer to keep extra room which I can crop later to eliminate all the distractions.

Editing Panel: The main interface of Lightroom in “Develop” mode. The histogram shows a dark image which needs to be brightened.
Shoot Context / Camera Settings
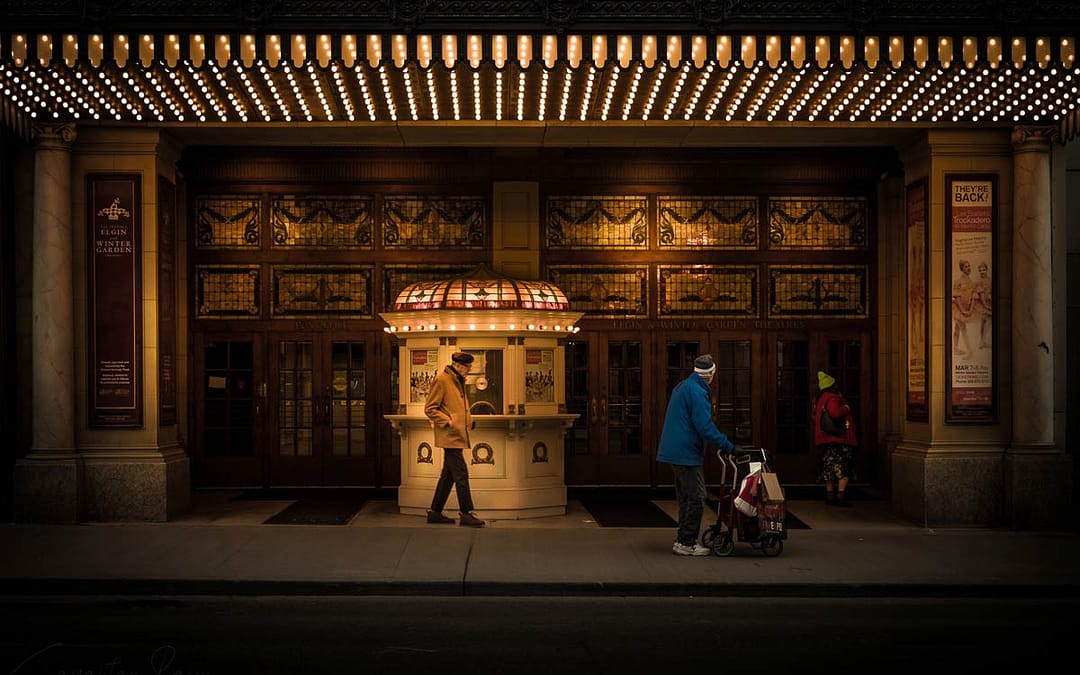
I was strolling along the Yonge Street (Toronto) when this vintage theatre hall grabbed my attention. An elderly theatre admirer was checking the posters while her companion was waiting for her outside. Another pedestrian was slowly moving towards the scene which created a nice balanced composition.
I quickly adjusted the camera settings and captured that moment. My intention was to freeze that action so I kept shutter speed high enough (1/60 sec) and accordingly adjusted aperture to f/5.6, which produced a nice sharp image.
Equipment
Camera: Nikon D750
Lens: Nikon AF-S NIKKOR 24-70mm F/2.8G ED Lens
Camera Settings
Shooting Mode: Manual
Focus Mode: Manual
Aperture: f/5.6
Shutter Speed: 1/60 Sec
ISO: 100
Focal Length: 40 mm
HSL Panel for Selective Colour Editing

Specifically for street photographs I always prefer to decrease the saturation from the whole image and bring it back using HSL panel. This way I can focus more on the selective colours only.
As you can see here, I have only changed the saturation and luminance for Red, Orange and Yellow colours to give it a unique tone.
Radial Filters for Local Adjustments
Local adjustments are always a good idea to emphasize your subject which helps to grab the viewers’ attention on it. For that I have added 7 radial filters, targeted small areas and increased the exposure a bit.

Finally comes the most interesting part where I play with dodging and burning to give it a 3-dimensional effect. That’s it! Hope you enjoy the final result!
I always save my adjustments as custom preset on Lightroom so that I can reuse it in future for similar types of photographs.
Happy shooting and editing!
Sayantan Basu
Website / IG
I am a software engineer by profession and photographer by passion. I am an avid traveler who loves to explore new places. Though I binge more on Landscape and Travel photography but I enjoy taking street photos as well.